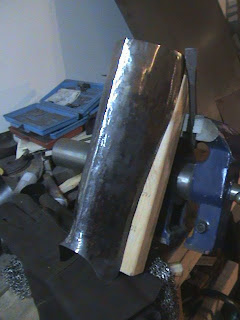
Creasing the greave

After much slothful momentum I finally got back to making real progress on the greaves. I laid the crease in the front of the left one by starting it from the inside with a blunted chisel into the smallest V in my swedge block. I cleaned that up from the outside on the edge of the I beam with both faces of my blue headed raising hammer (one's pretty squared off, and one's rounded), then blended that little triangle with the rest of the shin from the inside using my straight pein and the small round flat faced ball pein.
 I hit the greave with the flap wheel to clean up the crease a bit and highlight the areas which need more planishing. It's in pretty good shape really.
The back of this greave was being a pain. After trying to convince it to do what I wanted I annealed it AGAIN. The upper part of the calf will only behave in bits and pieces before springing back to some wonky shape.
Speaking of pieces, I tried firing the clay molds for the bronze casting a few days ago and learned that the clay has to be pretty darn dry before you get it hot. The buckle mold survived OK, but the little crucible I tossed in sounded like a Jiffy-Pop bag, sending fragments of clay all over the forge. Fortunately I'd been cautious and didn't wreck Maelgwyn's mold (though the sprew on that one cracked off on its own while drying- shouldn't be fatal at least.)

Comments